8683
How-to 10 min read November 6, 2019

How to create an authorization through social networks

Authorization via social networks increases the loyalty of users who are rid of registration. Access to personal data of users that can be used for marketing purposes will be an extra advantage for the owner.

Authorization through social networks features

Authorization via social networks is a handy tool for interacting with users. It allows them to avoid the tedious registration process and get quick access to the site features.

At the moment, to provide access to the site through authorization in social networks, you can integrate with more than 30 services. In addition to social networks, accounts in payment systems, or large online stores are also suitable for authorization.

Statistical studies show that 53% of users log in via Facebook and 44.8% through Google.

Benefits of authorization through social networks

  • According to the studies conducted in 2016 by LoginRadius, 93% of users prefer authorization using the standard registration via social networks, for example, via email;

  • 77% of users think that registering through social networks is a good solution;

  • this tool significantly increases the conversion, and also gives access to extensive personal information of users, allowing you to study their data and preferences. Such information is more reliable than the one which is used when registering on a new resource since most users are inclined to indicate incorrect data;

  • authorization via social networks allows you to get reposts. To do this, you need to realize the ability to share news, reviews, product information on social networks on the site. This will facilitate the referral traffic.

Disadvantages of the registration through social network

  • Registration via social networks is relevant if the target audience of the resource is young, since only 30% of visitors in a group over 35 years of age use authorization through social networks;

  • authorization using popular entertainment social networks is not the best option for B2B resources, in this segment, it's more efficient to use LinkedIn or Google+;

  • the user can delete the account on the social network, and consequently, lose access to the site;

  • in the case of a large number of authorization options, the user can forget through which social network he or she is authorized.

Authorization through social networks tools

#1

Gigya

Let's consider working with the Gigya service. The service provides authorization through several social networks, including Facebook, Twitter, Google+, and LinkedIn. This tool is used by more than 700 well-known companies because the logging-in via social networks is flexibly configured, taking into account the characteristics of the business.

Important personal data is collected while protecting confidentiality. The use of the service increases conversion and engagement rates, improves brand loyalty.

First of all, you need to go through the registration procedure. Indicate the type of authorization, country, and the mobile number to receive a confirmation code:
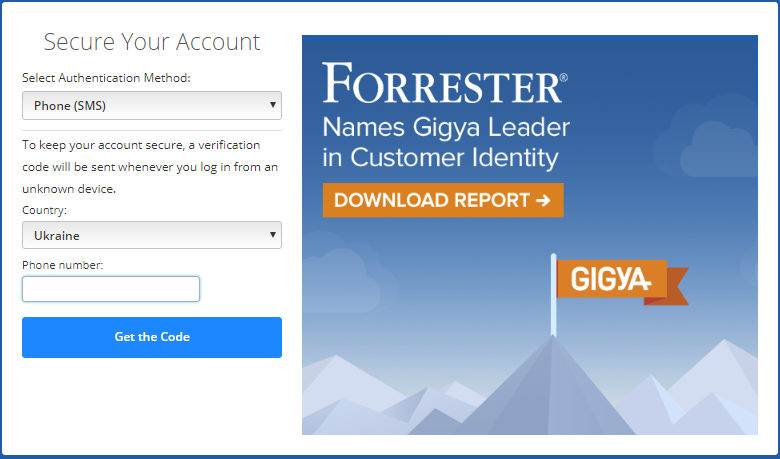
Registration in Gigya service
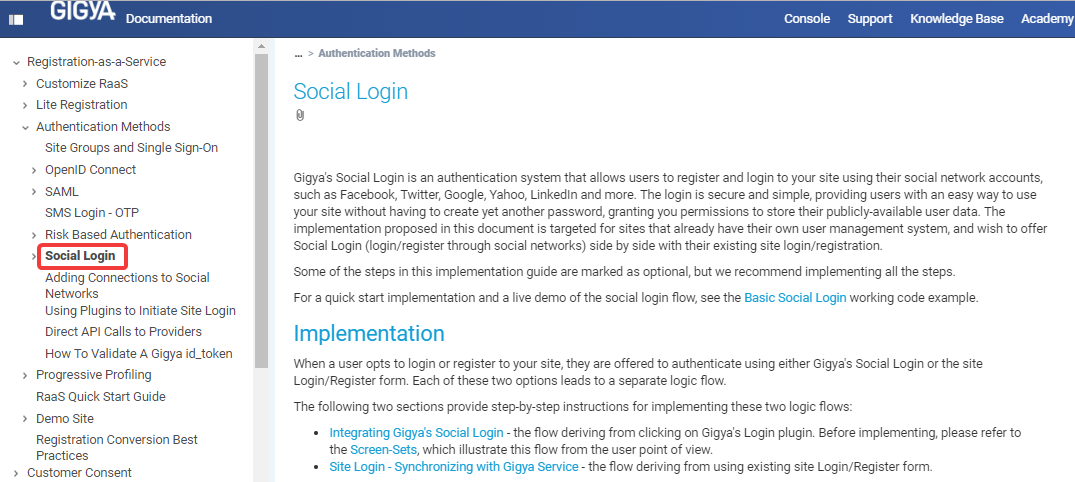
To write the code, you need to study the Gigya's documentation, which describes the functions, methods, and parameters for the client and server sides, using which authorization will work:
Gigya Social Login method
Service algorithm:

When a user wants to register or log in to the site, he or she is invited to authenticate using either Social Login Gigya or the registration form of the site. Each of these two options leads to a separate logical flow.

The Gigya documentation provides step-by-step instructions for implementing these two logical flows:
1
Integration with Gigya's Social Login, which is a stream caused by a click on the Gigya login plugin.
2
Site Login, which is a stream received using the existing site login/registration form.
After completing the settings, you'll see the following interface on the site:
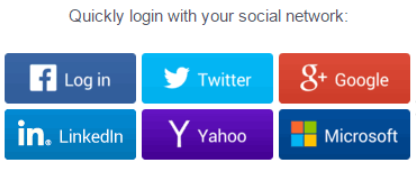
Quick login with social networks using Gigya
#2

Authorization through Facebook
Set up the authorization on the site in the Facebook for developers. Add a new application:
Adding an application in Facebook for Developers
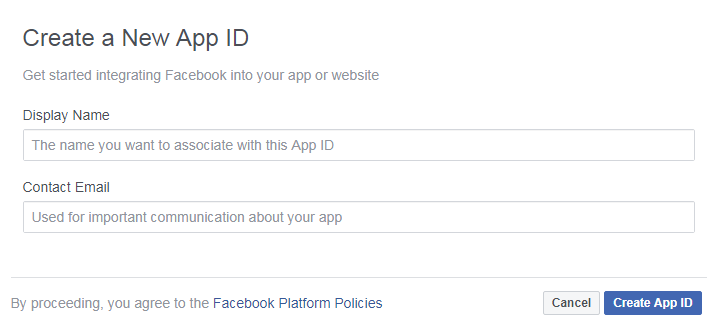
Indicate the app name, contact email, and click "Create App ID":
New app in Facebook for Developers
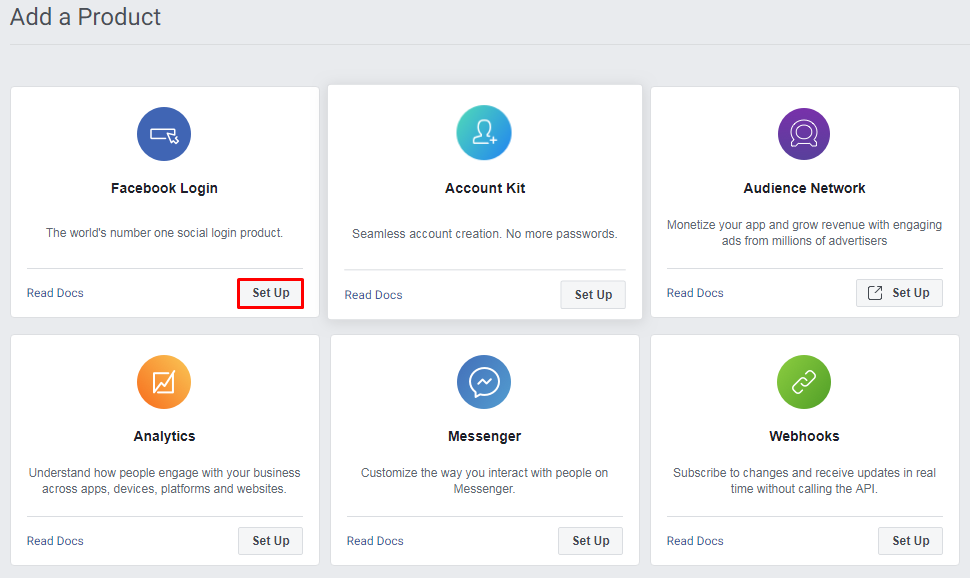
Select the "Facebook Login" scenario, and click "Set up":
Facebook login integration
To get the code, go to the "Getting Started" section of the app. Choose the platform "Web":
Authentication with Facebook on the website: how to set it up
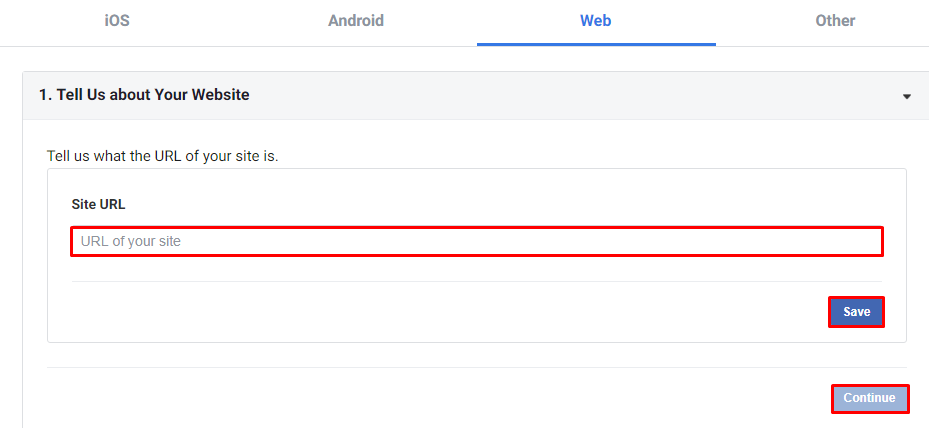
Next, enter the website address, and click "Continue":
Facebook login settings
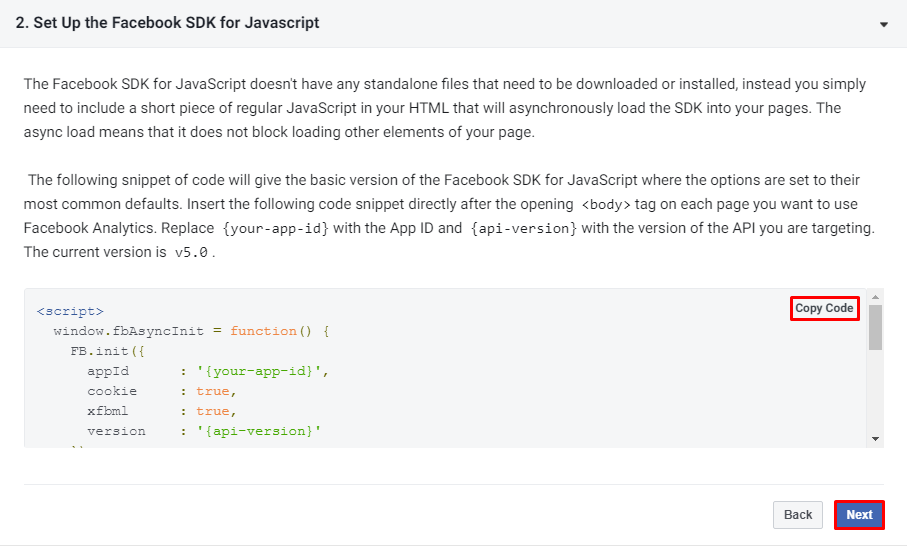
Then, you can see the instructions for setting up the Facebook SDK:
Facebook SDK for Javascript code
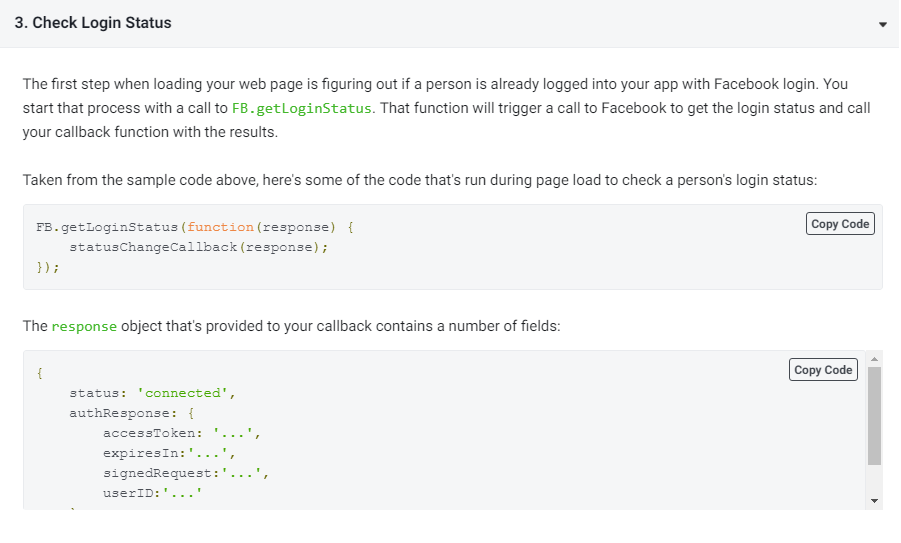
After that, review the user login status verification code:
Check login status on Facebook
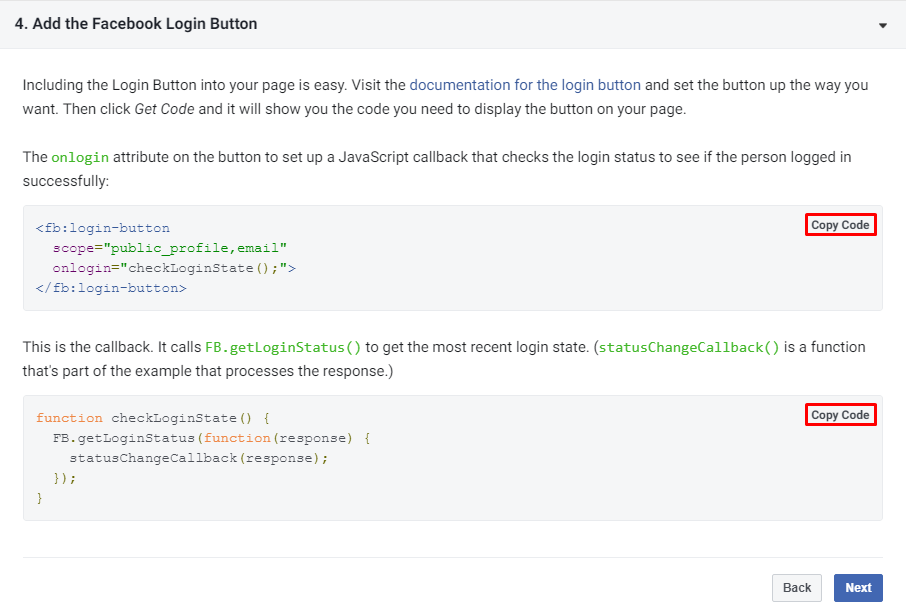
If necessary, you can copy the code fragments. By clicking next, you receive instructions on adding an authorization button to the site:
How to add the Facebook login button to the site
This completes the setup of adding an authorization function using Facebook login.
#3

Authorization through the Google Account

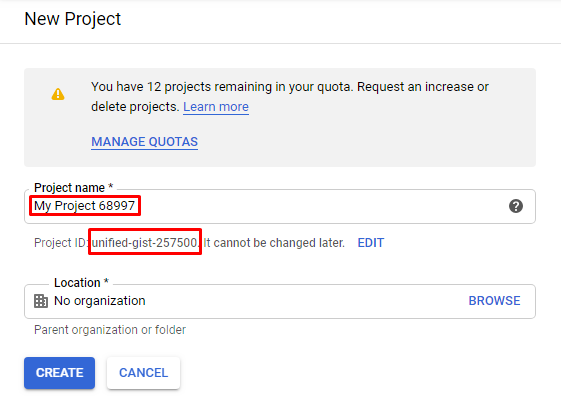
Click "Create Project" in the Google Developers Console:
Creating a project in Google APIs
New project ID in Google APIs
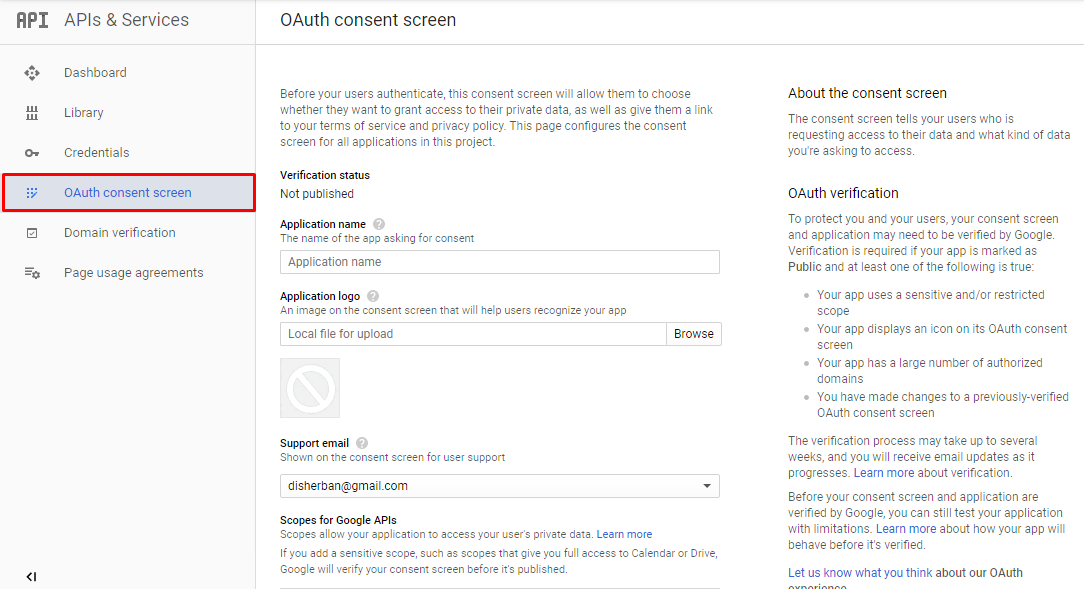
Go to the "OAuth consent screen" subsection located in the "Credentials" section:
OAuth consent screen in Google
Add the following data:

  • app name;
  • application logo;
  • technical support email address;
  • app scope (confidential user data that can be obtained);
  • links to the main page of the application, privacy policy, and terms of use.

After filling out the form, submit it for verification:
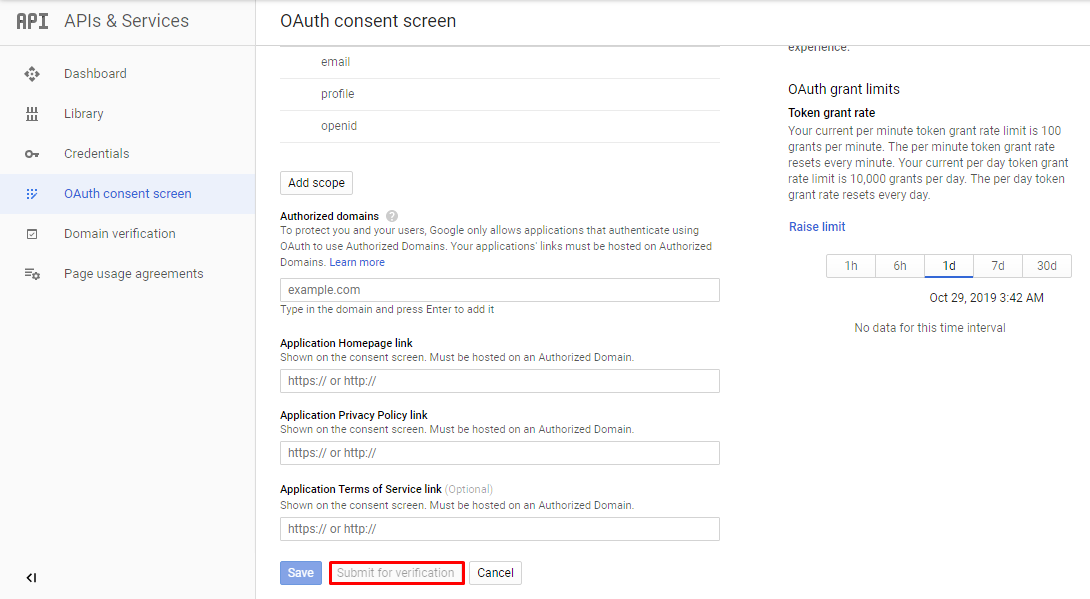
OAuth consent screen verification in Google Developers
This check takes several days. It's necessary because the application gets access to confidential user data. If you save the settings without verification, you can access the data no more than a hundred times, and at the same time, users will see a notification that Google hasn't verified the application.

Then configure the credentials:
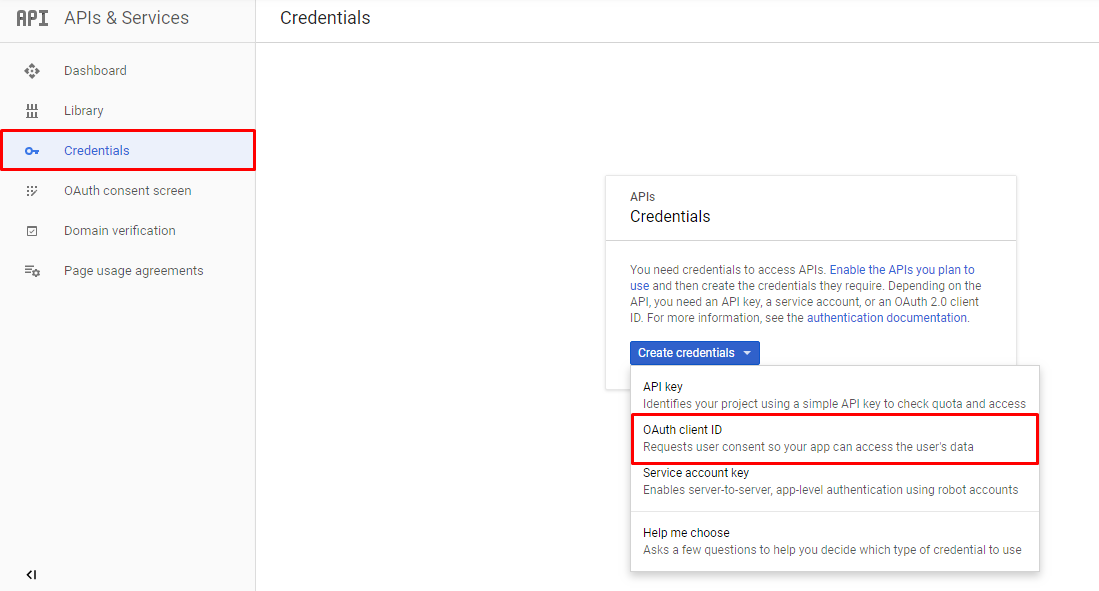
OAuth client ID
Select "OAuth Client ID". Set the type of application — Web. Fill in the name, allowed JavaScript sources, and redirects. As a result, you get the identifier and the client's secret, which will be used in the authorization code on the site.

CMS plugins for authorization using social networks

If one of the popular CMS is installed on the site, there are convenient solutions for authorization through social networks that do not require programming knowledge. Consider plugins for WordPress, Joomla, and Drupal.
#1

WordPress: Social Share, Social Login and Social Comments Plugin
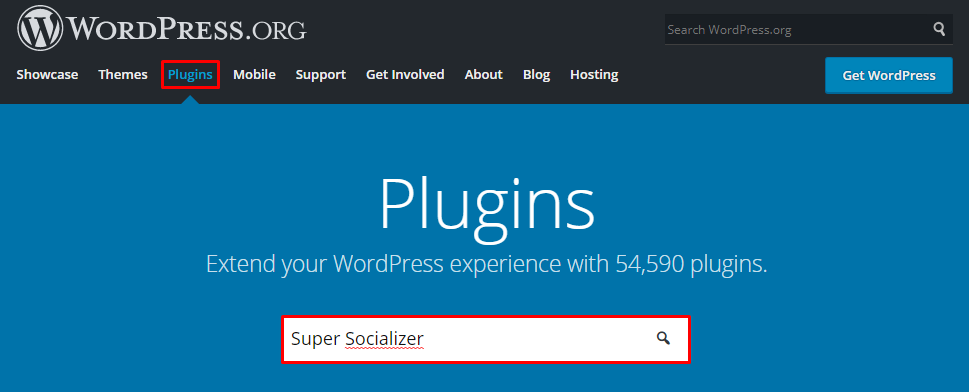
In WordPress, authorization via social networks is configured with the help of special plugins. You'll see the process using the Super Socializer as an example. To install it, go to the "Plugins" section of the WordPress admin panel and find through the search:
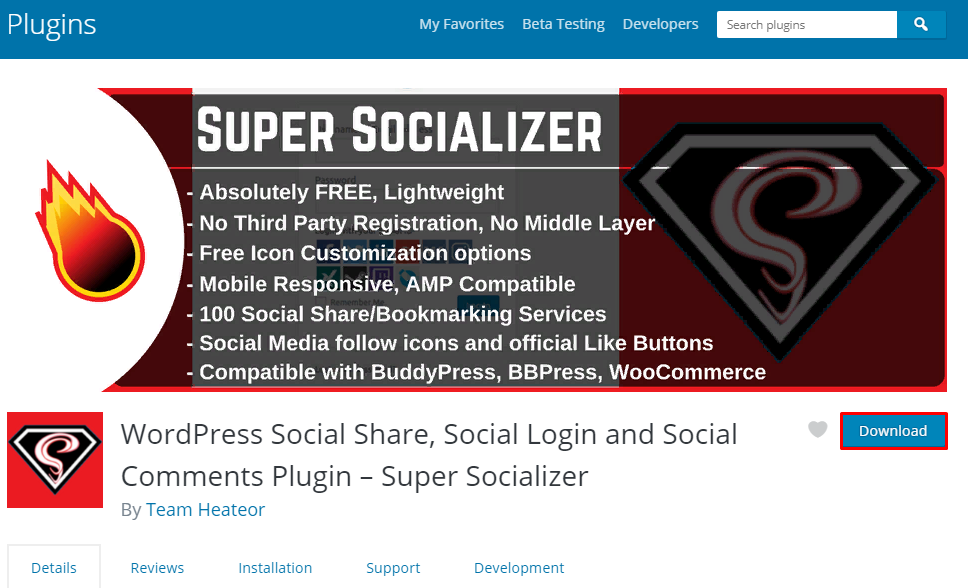
Super Socializer plugin for WordPress
Click "Download":
Super Socializer installation on WordPress
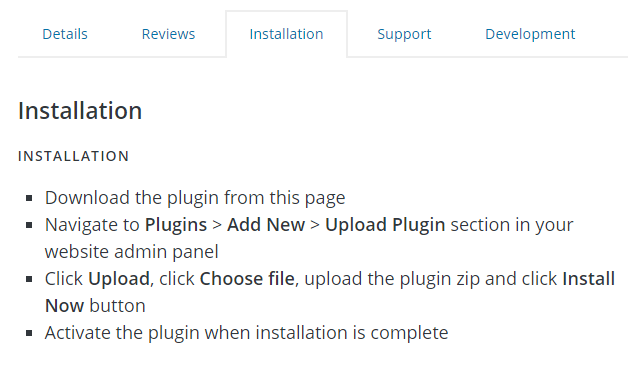
After that, go to the "Installation" module and follow the instructions:
How to install WordPress Super Socializer plugin
After activating the Super Socializer plugin, a horizontal and vertical menu with icons will appear on the site, allowing you to repost the site material using the selected social network.

The plugin implements the possibility of authorization on the site through the following social networks:

  • Facebook
  • Twitter
  • LinkedIn
  • Instagram
  • Xing and others.
#2

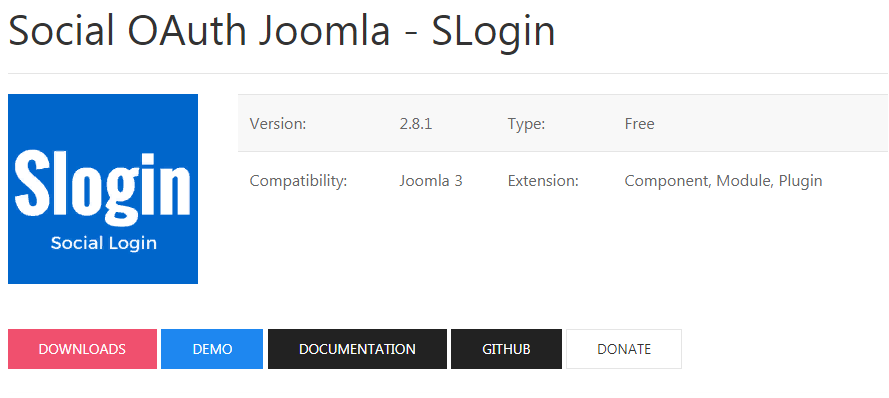
SLogin extension for Joomla

  • The extension is compatible with versions of Joomla 2.8.1;
  • consists of a component, module, and plugin, which together provide the ability to enter the site through 13 social networks and authorization providers;
SLogin extension for Joomla
  • the application is available in seven languages;
  • doesn't use intermediary services;
  • allows you to customize your design using CSS.
#3

ULogin plugin for Drupal

  • Using the uLogin tool discussed above with an advanced authorization module for Drupal, you can configure the access to the site through more than 20 social networks and services;

  • compatible with Drupal 6 and 7 versions, but with some differences in the list of supported functions in favor of the seventh version;

  • the developer recommends using it in combination with the Real Name module;

  • the module allows you to add personalized icons.
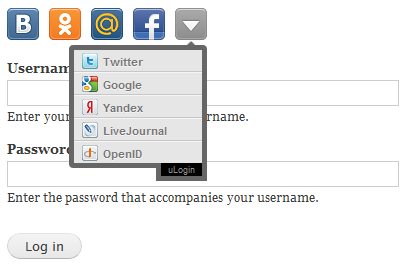
ULogin plugin for Drupal

Conclusion

1
Adding authorization through social networks to the resource is beneficial for both users and the site owner.
2
Such functionality saves the user time and eliminates the need to fill out long forms, remember logins and passwords.
3
The site owner receives an increase in the number of authorized users, a decrease in the outflow of visitors who have forgotten their usernames and passwords during the standard registration.
4
Logging into the site via a social network gives access to extensive personal data of the target audience.
5
To allow users to enter your site through social networks, use one of three options:

  • universal services that combine authorization through various social networks and provide instructions on the code writing;
  • authorization using a specific social network;
  • plugins designed for the installed content management system.

This article is a part of Serpstat's Checklist tool
Checklist at Serpstat" title = "How to create an authorization through social networks 16261788369064" />
Checklist is a ready-to-do list that helps to keep reporting of the work progress on a specific project. The tool contains templates with an extensive list of project development parameters where you can also add your own items and plans.
Try Checklist now

Speed up your search marketing growth with Serpstat!

Keyword and backlink opportunities, competitors' online strategy, daily rankings and SEO-related issues.

A pack of tools for reducing your time on SEO tasks.

Get free 7-day trial

Rate the article on a five-point scale

The article has already been rated by 0 people on average out of 5
Found an error? Select it and press Ctrl + Enter to tell us

Discover More SEO Tools

Tools for Keywords

Keywords Research Tools – uncover untapped potential in your niche

Serpstat Features

SERP SEO Tool – the ultimate solution for website optimization

Keyword Difficulty Tool

Stay ahead of the competition and dominate your niche with our keywords difficulty tool

Check Page for SEO

On-page SEO checker – identify technical issues, optimize and drive more traffic to your website

Share this article with your friends

Are you sure?

Introducing Serpstat

Find out about the main features of the service in a convenient way for you!

Please send a request, and our specialist will offer you education options: a personal demonstration, a trial period, or materials for self-study and increasing expertise — everything for a comfortable start to work with Serpstat.

Name

Email

Phone

We are glad of your comment
I agree to Serpstat`s Privacy Policy.

Thank you, we have saved your new mailing settings.

Report a bug

Cancel
Open support chat
mail pocket flipboard Messenger telegramm