Start Exploring Keyword Ideas
Use Serpstat to find the best keywords for your website
How To Use .htaccess To Increase The Security Of Your Website

For most people, it's a problem they rarely deal with.
One of the ways to avoid this danger and increase the security of your website is to edit the .htaccess file.
In this article, you are going to learn some easy methods of how you can use this specific file in your web directory to make your website a bit more secure.
What is the .htaccess file?
How do you get access to .htaccess?
Methods to secure a website via .htaccess
- Use .htpasswd
- Prohibit access by IP–address
- Use a firewall
- Block access to xml-rpc
- Block directory browsing
- Prohibit access to /wp-includes
- Image hotlinking
- Forbid the author scan
- Limit the file size of uploads
- Force https
The Importance Of Website Security
However, the trend of websites of small companies and local businesses also getting attacked has been ascending.
According to this study, in 2018 approximately 80,000 attacks were executed by hackers every day.
The vulnerability of websites varies, but there is a tendency that small businesses in particular are barely protected against such attacks.
There is no all-embracing protection, just a more developed one, but there are many basic attack methods even a layperson can apply.
If you have a suspicion that your website might have gotten hacked, the first thing you should do is check your website for viruses.
What Is The .Htaccess File?
The .htaccess file allows you to set server configurations for a specific directory. This could be the root directory for your website or an /images or /downloads directory."
How do you get access to .htaccess?
For this purpose, you should use a so-called "FTP" (File Transfer Protocol) application, for example, open-source software like FileZilla, which I personally recommend.
Once you have downloaded and installed FileZilla, you can just open the program and enter your login details:

Your username and password are provided by your web host (just ask them if you are unsure which data to use).
The last field "Port" can either be left blank or you can enter the standard port "21" or "22" for sftp.
Then you can click the button, and in a short time, your connection will be ready.
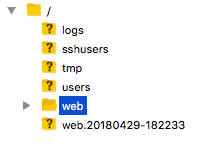
If your login data was correct, you should see an overview of your directory:
In case you already did it: Just upload the backup file and rename it to ".htaccess" after deleting the false one.
Methods To Secure A Website Via .Htaccess
#1 Use .htpasswd
For example, for WordPress websites, "yourdomain.com/wp-admin", is the URL of the admin dashboard.
If you are using a plugin like "Limit Login Attempts" , you may have noticed the high amount of brute-force attacks to your login dashboard every day.
With ".htpasswd" we build another security gate in front of this admin dashboard.
First, you have to generate your login details.
In order to do that, visit this website and enter your username as well as a new secure password:
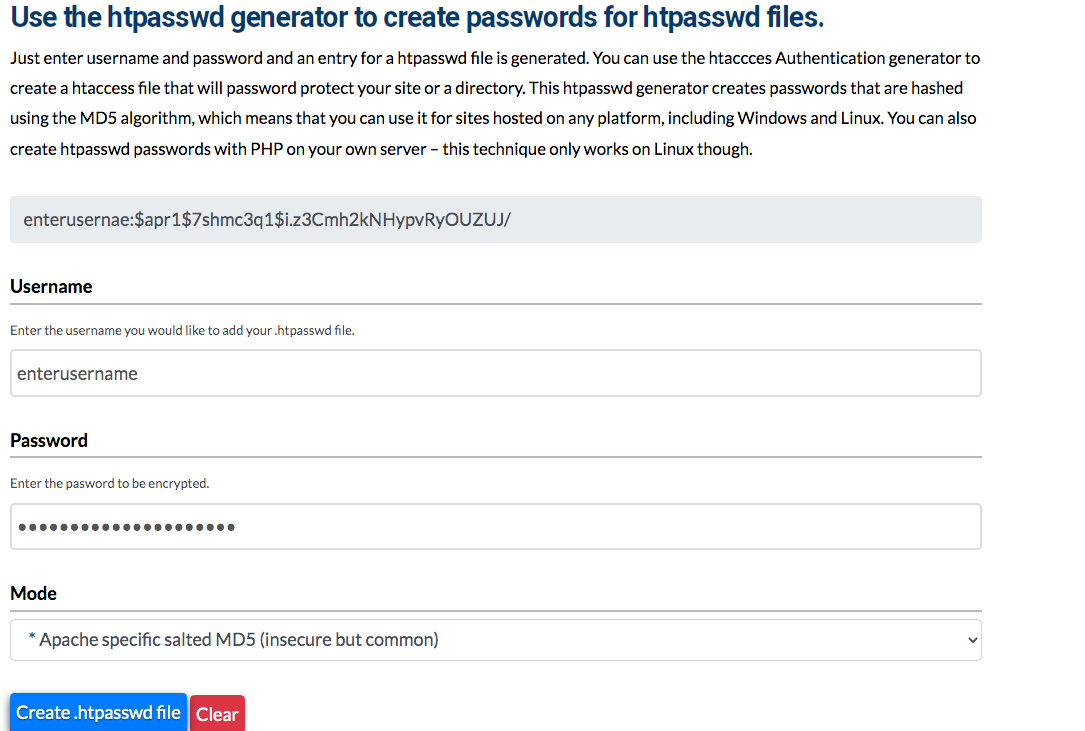
After clicking the button, you will receive your hashed password (displayed in the screenshot above the username).
As you have now your password, insert it into a standard text editor and save the file under the designation ".htpasswd"
After that, please upload this file via e.g. FileZilla into your "/wp-admin" folder in your web directory to secure just the admin dashboard.
If you want to secure your whole website, upload the file into the general web directory.
Be aware that if you choose the second option, a password on every page of your site will be demanded.
This doesn't make sense for a public website except you want your website to be private or set up a maintenance mode where you can edit the site until it is ready.
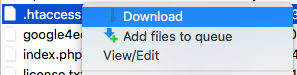
For the last step you have to edit your .htaccess file and add the following code:
# protect /wp-admin
AuthName "admin dashboard"
AuthType Basic
AuthUserFile /path/wp-admin/.htpasswd
require valid-user
This path has to be replaced by the path of the .htpasswd file you have uploaded in the beginning.
To find this path, you need another file called "fullpath.php"
For this, create a new file in your text editor and insert the following code:
<?php
$dir = dirname(__FILE__);
echo "<p>Full path to this dir: " . $dir . "</p>";
echo "<p>Full path to a .htpasswd file in this dir: " . $dir . "/.htpasswd" . "</p>";
?>
Now just paste this file into the folder where you uploaded the .htpasswd file and enter the following URL into your browser : https://www.domain.com/path/to/fullpath.php
In the second line you will see the path of the .htpasswd file which you just copy and paste it into the code in your .htaccess file you have created at the very beginning (replace red marked path):
If you have taken the steps listed above correctly, your login dashboard should now be secured by a second login window.
# protect /wp-admin
AuthName "admin dashboard"
AuthType Basic
AuthUserFile /path/wp-admin/.htpasswd
require valid-user
#2 Prohibit access by IP–address
For this you simply add the following code to the .htaccess file placed in the "/wp-admin" – folder and replace the red x`s:
AuthUserFile /dev/null
AuthGroupFile /dev/null
AuthName "Admin dashboard"
AuthType Basic
<LIMIT GET>
order deny,allow
deny from all
# whitelist IP Admin
allow from xx.xx.xx.xxx
</LIMIT>
#3 Use a firewall
# 6G FIREWALL/BLACKLIST
# @ https://perishablepress.com/6g/

# 6G:[QUERY STRING]
<IfModule mod_rewrite.c>
	RewriteEngine On
	RewriteCond %{QUERY_STRING} (eval\() [NC,OR]
	RewriteCond %{QUERY_STRING} (127\.0\.0\.1) [NC,OR]
	RewriteCond %{QUERY_STRING} ([a-z0-9]{2000,}) [NC,OR]
	RewriteCond %{QUERY_STRING} (javascript:)(.*)(;) [NC,OR]
	RewriteCond %{QUERY_STRING} (base64_encode)(.*)(\() [NC,OR]
	RewriteCond %{QUERY_STRING} (GLOBALS|REQUEST)(=|\[) [NC,OR]
	RewriteCond %{QUERY_STRING} (<|%3C)(.*)script(.*)(>|%3) [NC,OR]
	RewriteCond %{QUERY_STRING} (\\|\.\.\.|\.\./|~|`|<|>|\|) [NC,OR]
	RewriteCond %{QUERY_STRING} (boot\.ini|etc/passwd|self/environ) [NC,OR]
	RewriteCond %{QUERY_STRING} (thumbs?(_editor|open)?|tim(thumb)?)\.php [NC,OR]
	RewriteCond %{QUERY_STRING} (\'|\")(.*)(drop|insert|md5|select|union) [NC]
	RewriteRule .* - [F]
</IfModule>

# 6G:[REQUEST METHOD]
<IfModule mod_rewrite.c>
	RewriteCond %{REQUEST_METHOD} ^(connect|debug|move|put|trace|track) [NC]
	RewriteRule .* - [F]
</IfModule>

# 6G:[REFERRER]
<IfModule mod_rewrite.c>
	RewriteCond %{HTTP_REFERER} ([a-z0-9]{2000,}) [NC,OR]
	RewriteCond %{HTTP_REFERER} (semalt.com|todaperfeita) [NC]
	RewriteRule .* - [F]
</IfModule>

# 6G:[REQUEST STRING]
<IfModule mod_alias.c>
	RedirectMatch 403 (?i)([a-z0-9]{2000,})
	RedirectMatch 403 (?i)(https?|ftp|php):/
	RedirectMatch 403 (?i)(base64_encode)(.*)(\()
	RedirectMatch 403 (?i)(=\\\'|=\\%27|/\\\'/?)\.
	RedirectMatch 403 (?i)/(\$(\&)?|\*|\"|\.|,|&|&?)/?$
	RedirectMatch 403 (?i)(\{0\}|\(/\(|\.\.\.|\+\+\+|\\\"\\\")
	RedirectMatch 403 (?i)(~|`|<|>|:|;|,|%|\\|\{|\}|\[|\]|\|)
	RedirectMatch 403 (?i)/(=|\$&|_mm|cgi-|muieblack)
	RedirectMatch 403 (?i)(&pws=0|_vti_|\(null\)|\{\$itemURL\}|echo(.*)kae|etc/passwd|eval\(|self/environ)
	RedirectMatch 403 (?i)\.(aspx?|bash|bak?|cfg|cgi|dll|exe|git|hg|ini|jsp|log|mdb|out|sql|svn|swp|tar|rar|rdf)$
	RedirectMatch 403 (?i)/(^$|(wp-)?config|mobiquo|phpinfo|shell|sqlpatch|thumb|thumb_editor|thumbopen|timthumb|webshell)\.php
</IfModule>

# 6G:[USER AGENT]
<IfModule mod_setenvif.c>
	SetEnvIfNoCase User-Agent ([a-z0-9]{2000,}) bad_bot
	SetEnvIfNoCase User-Agent (archive.org|binlar|casper|checkpriv|choppy|clshttp|cmsworld|diavol|dotbot|extract|feedfinder|flicky|g00g1e|harvest|heritrix|httrack|kmccrew|loader|miner|nikto|nutch|planetwork|postrank|purebot|pycurl|python|seekerspider|siclab|skygrid|sqlmap|sucker|turnit|vikspider|winhttp|xxxyy|youda|zmeu|zune) bad_bot

	# Apache < 2.3
	<IfModule !mod_authz_core.c>
		Order Allow,Deny
		Allow from all
		Deny from env=bad_bot
	</IfModule>

	# Apache >= 2.3
	<IfModule mod_authz_core.c>
		<RequireAll>
			Require all Granted
			Require not env bad_bot
		</RequireAll>
	</IfModule>
</IfModule>
#4 Block access to xml-rpc
As practical as it is, so dangerous can it be because hackers can use an access to control your site.
This is the code to block this functionality via .htaccess:
# Block xmlrpc.php
<Files xmlrpc.php>
order deny,allow
deny from all
</Files>
#5 Block directory browsing
What does that mean?
Simply, it means that website visitors and also hackers can search your directory folders and scan it for security gaps.
Normally, you browse for specific folders as follows (example): yourdomain.com/wp-includes
With this short snippet, you block those activities:
# block directory browsing
Options All -Indexes
#6 Prohibit access to /wp-includes
Logically, a hacker shouldn't be granted a view into this file.
For this purpose, you use this snippet:
# disable /wp-includes access
<IfModule mod_rewrite.c>
RewriteEngine On
RewriteBase /
RewriteRule ^wp-admin/includes/ - [F,L]
<IfModule mod_rewrite.c>
RewriteEngine On
RewriteBase /
RewriteRule ^wp-admin/includes/ - [F,L]
RewriteRule !^wp-includes/ - [S=3]
RewriteRule ^wp-includes/[^/]+\.php$ - [F,L]
RewriteRule ^wp-includes/js/tinymce/langs/.+\.php - [F,L]
RewriteRule ^wp-includes/theme-compat/ - [F,L]
</IfModule>
#7 Image hotlinking
This results in the following problem: Every time, when someone visits their sites and your images are loaded, your server-bandwith will be used up.
Use this code to stop it:
RewriteEngine on
RewriteCond %{HTTP_REFERER} !^$
RewriteCond %{HTTP_REFERER} !^http://(www\.)yourdomain.com/.*$ [NC]
RewriteRule \.(gif|jpg|jpeg|bmp|zip|rar|mp3|flv|swf|xml|php|png|css|pdf)$ - [F]
All visitors who try to see your images on alien websites will receive a 404 – error messaging.
#8 Forbid the author scan
Regarding the functionality, the username could be called equal to the password, except you are using an obvious username like your name.
Every username is attached to an ID.
Presumed, a hacker wants to find out your username and your ID is "1". Then, she or he visits the following URL:
https://yourdomain.com?author=1
If there's a match, there will be a redirect to a URL containing the username.
Now the password has to be hacked, and your backend is under control.
To prevent such ID – scans you can use the following code:
# BEGIN block author scans
RewriteEngine On
RewriteBase /
RewriteCond %{QUERY_STRING} (author=\d+) [NC]
RewriteRule .* - [F]
# END block author scans
#9 Limit the file size of uploads
This is frequently an invitation to hackers who want to easily paralyze your site.
In order to do that, they just have to upload monstrous files and your server could be down for a certain time.
You can limit this possibility by using this line of code:
LimitRequestBody 10240000
#10 Force https
This is very important, because an SSL – certificate ensures that the data, visitors enter into your website, for example via a contact form, are protected.
Just add this code to your .htaccess file:
RewriteEngine On
RewriteCond %{HTTPS} off
RewriteRule ^(.*)$ https://%{HTTP_HOST}%{REQUEST_URI} [L,R=301]
Conclusion
Despite that fact, an all-embracing security optimization is a lot more complicated and definitely not feasible by beginners.
In today's time, it is necessary to constantly improve the security system of a website due to the ever-growing danger.
However, always remember the following: You are always just as developed as the hackers aren't.
Speed up your search marketing growth with Serpstat!
Keyword and backlink opportunities, competitors' online strategy, daily rankings and SEO-related issues.
A pack of tools for reducing your time on SEO tasks.
Discover More SEO Tools
Tools for Keywords
Keywords Research Tools – uncover untapped potential in your niche
Serpstat Features
SERP SEO Tool – the ultimate solution for website optimization
Keyword Difficulty Tool
Stay ahead of the competition and dominate your niche with our keywords difficulty tool
Check Page for SEO
On-page SEO checker – identify technical issues, optimize and drive more traffic to your website
Recommended posts
Cases, life hacks, researches, and useful articles
Don’t you have time to follow the news? No worries! Our editor will choose articles that will definitely help you with your work. Join our cozy community :)
By clicking the button, you agree to our privacy policy.